

26 July 2024
Pak Choi is grown for its tasty leaves which are superb when added to stir fries and salads.
The taste is similar to that of mild cabbage and spinach and is a popular addition to many oriental dishes.
Posted in Blog Home

For beginners looking to get in gardening, seed sowing doesn't have to be daunting or overwhelming. With the right knowledge, anyone can easily learn how to sow seeds and get great results. This guide will provide a simple, step-by-step plan on how to get started with seed sowing, as well as some useful tips along the way. Whether you're a total beginner or just in need of a refresher course, we've got you covered!
Seeds come in all shapes and sizes, from tiny dust-like particles to large beans. They can be either annuals or perennials, depending on the type of plant they will produce. Annuals must be replanted each year while perennials will come back every year.
The two main types of seeds are open-pollinated and hybrid seeds. Open-pollinated seeds are the result of natural pollination between parent plants, and these plants will reproduce true to their parent varieties when grown. Hybrid seeds are created by crossing two different varieties of a single species, resulting in offspring with unique characteristics that may not be true to either parent variety.
In addition to open-pollinated and hybrid seeds, there are also heirloom varieties which are passed down through generations of gardeners and farmers.
Now that you know the different types of seeds and how to choose them, it's time to prepare the soil. Preparing the soil is an essential step before sowing your seeds. To ensure a healthy environment for your plants to grow, you will want to make sure there are no weeds or other obstructions in the soil. This will help to provide a good foundation for your seedlings and help them thrive.
Before getting started, it's important to gather the necessary supplies. You'll need a garden spade, trowel, rake, and hoe. You'll also need some compost and fertilizer to enrich the soil. Additionally, you'll want to make sure you have an adequate amount of water for irrigating your plants once they start growing.
Once you have all of your supplies ready, it's time to begin preparing the soil. Start by removing any vegetation from the area where you will be planting your seeds. Then dig up any large rocks or stones that may be present in the ground and discard them away from your garden bed. Till the soil with a garden spade or tiller to break up clumps of dirt and create a smooth surface for planting. Add compost or fertilizer if desired and mix into the topsoil with a rake or hoe until it is evenly spread out over the entire area. Finally, water your prepared soil thoroughly so that it is moist but not soggy when touched with your hands.
By following these steps you can ensure that your seedlings will have plenty of nutrients available as they grow, making them healthier and more likely to produce abundant yields of fruits and vegetables!
When it comes to selecting and storing seeds, there are a few important factors to consider. First and foremost, you'll want to make sure the seed you purchase is of high quality. Check the packaging for its expiration date and look for any signs of damage or spoilage. Additionally, be mindful of where the seed was sourced from and how it was stored prior to purchase.
The next step is to store your seeds properly for optimal germination. Keep them in an airtight container, such as a mason jar or plastic bag. Make sure the container is moisture-proof and dark coloured to protect against light exposure. Store your seeds in a cool, dry place away from direct sunlight and extreme temperatures. Finally, label each container with the type of seed so that you won't accidentally mix them up when planting.
By following these steps, you can ensure that your seeds will remain viable until it's time to sow them in the garden. This way, you can get started on growing healthy plants right away!
When planting seeds, it's important to consider the depth and spacing of the seeds. How deep you plant your seeds depends on their size. Generally speaking, larger seeds should be planted deeper, while smaller ones should be sown just below the surface or not at all. You can also refer to seed packets for specific instructions on planting depth.
The amount of space needed between plants will depend on how large they will grow and how much light they need to thrive. For example, tomatoes need more space than lettuce as they require more sunlight to produce fruit. When planting in rows, you should leave enough room between them for weeds to be easily pulled out without disturbing the surrounding plants.
In addition, when sowing multiple varieties of vegetables in one area, make sure you keep track of which variety is planted where so that you can easily identify them later on in the season. This way you'll know exactly what needs to be harvested when it comes time!
Once you have planted your seeds, it is important to provide them with adequate amounts of water. The amount of water each plant needs varies depending on the type of seed being grown and its size. Generally, most plants require a consistent amount of moisture in order to germinate and grow properly.
When watering plants, be sure to use either lukewarm or room temperature water. Cold water can shock the young seedlings and prevent them from growing properly. Water should also be applied evenly around the base of the plant, as opposed to directly onto its leaves or stems.
Lastly, it is important to monitor your soil’s moisture levels often in order to make sure your plants are receiving enough water without being overwatered. If your soil feels dry when touched, it’s time to give your plants a drink!
Light requirement for germination varies between plants. Some species require light to germinate, while others need darkness or a combination of both. Generally speaking, it is best to follow the instructions provided on the seed packet as to whether your seeds require light or darkness to germinate.
If your seeds need light, you can place them on a windowsill or use a grow lamp. If the seed packet does not specify what type of lighting is needed, then it's best to use fluorescent lights that are positioned about 6-12 inches above the seed trays. For optimal growth conditions, you should keep the lights on for 12-16 hours per day and turn them off for 8-10 hours each day.
It's important to remember that too much light can prevent proper germination, so make sure you don't leave the lights on longer than necessary. Carefully monitoring and adjusting the amount of light your plant gets will ensure successful germination and healthy growth.
Seed germination is a process that requires specific conditions in order to be successful. Temperature is one of the most important factors for seed germination. Seeds won't germinate if the temperature is outside their ideal range. The ideal temperature for germination will depend on the species of seed you are planting.
For many vegetable and flower seeds, the ideal temperature for germination ranges from 65°F to 75°F (18°C to 24°C). If you are planting seeds that require cooler temperatures, like spinach, kale, or lettuce, the ideal range is between 50°F and 65°F (10°C to 18°C). On the other hand, if you want to plant warm-weather crops such as tomatoes, peppers, or squash, then you'll need a soil temperature of at least 70°F (21°C). It's important to note that some seeds may require higher or lower temperatures than these recommended ranges.
When planning your garden, make sure to research the ideal temperature range for each type of seed you're planting. You can use a soil thermometer or an indoor/outdoor digital thermometer to monitor soil temperatures throughout your garden. With these tools and knowledge about optimal temperatures for each species of seed you plant, your success rate for growing healthy plants will increase significantly.
Now that we have discussed the temperature requirements for germination, let's shift our focus to the preparation of containers. Depending on the type of seed you are planting and your personal preference, there are several options for containers.
For smaller plants, such as herbs and flowers, it's best to use shallow trays or pots with drainage holes at the bottom. For larger vegetables or trees, a deeper pot or raised bed is recommended. The size of the container should be based on how much soil and space the plant will need to grow properly.
Be sure to use a quality soil mix that is specifically designed for growing plants from seeds. You can also add fertilizer to provide extra nutrients and help promote healthy growth. Additionally, make sure to moisten the soil before sowing the seeds; it should feel damp but not wet when you touch it. After completing these steps, you're now ready to start sowing your seeds!
Once the seeds have been planted, it's time to focus on the care and maintenance of the seedlings. This involves making sure the seedlings get enough sunlight, water, and nutrients.
One of the most important things to do is to make sure that the soil is kept moist but not soggy. You should check the soil daily and water as needed. The amount of water will vary depending on the type of seedlings you've planted, so be sure to read up on their specific needs.
Fertilizing is also an important part of caring for your seedlings. This helps them get all the nutrients they need for growth and development. It's best to use an organic fertilizer that's specifically made for seedlings and follow directions closely.
Finally, it's important to provide adequate light for your seedlings, whether it be natural sunlight or artificial lighting from a grow light. Make sure that your seedlings are getting at least six hours of light per day in order to promote healthy growth and development.
Fertiliser is an essential component for successful seed germination. It's important to ensure the soil has all the nutrients required for healthy plant growth. To do this, it’s necessary to use a well-balanced fertiliser that contains nitrogen, phosphorus, and potassium.
When applying fertiliser, it’s important to follow the instructions on the package. The amount of fertiliser needed will vary depending on the type of seed and the size of your garden. If you’re using a chemical fertiliser, make sure it's suitable for your plants and don't apply too much at once as this can damage them. If you're using an organic fertiliser, make sure it's been composted before use.
After adding fertiliser to the soil mix, be sure to water it so that it reaches all parts of the planting area. This helps ensure that all seeds get equal amounts of nourishment from their new home. With proper care and attention, your seeds should have no trouble growing into beautiful plants!
Now that the soil is ready and you've selected the appropriate fertiliser, it's time to transplant your seedlings. Transplanting seedlings can be a daunting task for many gardeners, but following these steps will ensure that your plants get off to a good start.
First, make sure your seedlings are big enough for transplanting. It is important to wait until the plants have developed their second set of true leaves before moving them into larger containers or planting them in the ground. Once they are ready, prepare the new containers or beds with fresh soil and water them thoroughly.
Next, carefully dig up each seedling and gently remove any excess dirt from around its roots. Take extra care not to damage the delicate root systems as this could stunt plant growth. Finally, replant each seedling at an appropriate depth in the new container or bed and water again. Make sure you also provide support for taller varieties if needed.
With some patience and practice, you'll be able to successfully transplant your seedlings in no time!
Thinning out seedlings is an important step in the sowing process. It helps to ensure that the plants will have enough room to grow and get adequate sunlight. To thin out your seedlings, start by identifying the strongest one of each type. It should be at least two inches tall with two or more leaves. Take a pair of scissors or a small knife and snip off any others that are too close to it. When you're done, you should have one healthy plant for each type of seed you planted.
The next step is to check for overcrowding by measuring the distance between each plant. The ideal spacing varies depending on the type of plant, but as a general rule keep them at least three inches apart. If they are too close together, gently pull out any extra plants and discard them in the compost pile or give them away to friends.
Once your plants have been thinned out, make sure they get plenty of sunlight and water so they can continue to thrive. Fertilize regularly and pull any weeds that may compete with their growth. With proper care, your seedlings will soon be ready for transplanting into their permanent homes!
Many factors can prevent seeds from germinating. Firstly, some seeds require a period of dormancy before they will germinate. This dormancy period is typically the result of the seed coat hardening, which prevents the embryo inside from developing. To break this dormancy period and allow the seed to germinate, you must provide it with the right conditions such as sufficient moisture, temperature and light.
Secondly, poor soil quality or overly acidic soil can also prevent seeds from germinating. The optimal pH level for most plant species is between 6 and 7, so if your soil has a lower pH than this it’s likely that your seeds won’t be able to grow. Compacted or poorly aerated soil can also cause problems as this will prevent water and oxygen from reaching the seed. Therefore, it’s important to ensure that your soil is well-draining and free of debris before sowing your seeds.
Lastly, too much or too little water can also inhibit seed germination. Too much water will cause the seed to rot while too little water will dry out the seed before it has a chance to sprout. It’s important to maintain consistent moisture levels in the soil during the entire germination process in order to achieve optimal growth results.
In summary, there are many reasons why your seeds may not germinate including dormancy periods, poor soil quality or pH level as well as too much or too little water. It’s important to take all these factors into account when planting your seeds in order to give them the best chance at successful growth.
Now that you've learned the basics of seed sowing for beginners, you can confidently get started on your own gardening project. With a little bit of patience, you'll be able to enjoy growing your own plants from seed.
Before you begin, it's important to choose the right type of seeds and understand the planting depth and spacing requirements. Additionally, make sure to prepare the soil with fertiliser and water as needed. Once your seeds have germinated, remember to thin out the seedlings and transplant them when they are ready.
If you encounter any problems along the way, don't be discouraged! There could be many reasons why your seeds may not germinate - it could be due to improper planting depth or lack of sufficient moisture. Just keep trying and you'll eventually be rewarded with a flourishing garden full of beautiful plants!
Share your best seed sowing tip! Leave a comment below and let everyone know....
All blog content on this page is copyright of SimplySeed and is not to be reproduced without prior written permission. ©
Pak Choi is grown for its tasty leaves which are superb when added to stir fries and salads.
The taste is similar to that of mild cabbage and spinach and is a popular addition to many oriental dishes.

Feeding cucumber plants is crucial for healthy growth and plenty of fruit. Knowing when to start feeding and what fertilisers to use can make all the difference in your harvest.
Here’s our top tips and best practices

As July’s warm sunshine brings growth to UK gardens they also bring several common garden diseases.
Our Blog post looks at 5 garden diseases to watch out for this July and how to prevent and treat them.

Planting in autumn is usually better as it allows the cloves to get established before winter and then produce better clove formation in spring.
If you miss the autumn window don’t worry – you can still plant....

Oregano and marjoram are related but have different flavours; oregano is bold and pungent, whilst marjoram is sweet and floral....

When and how to cut back lavender in the UK? Find out the method and best time to cut back your lavender for a profusion of flowers....
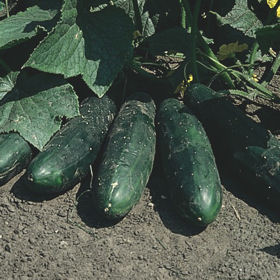
Marketmore is an outdoor ridge variety, producing.....
Packet Content: 20 Seeds
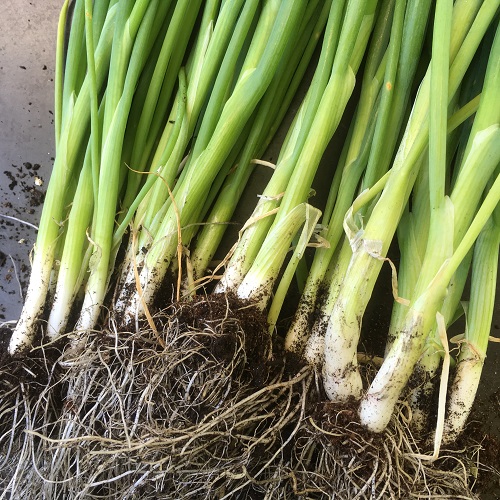
White Lisbon is the standard variety for bulbing salad.....
Average Contents : 500 seeds
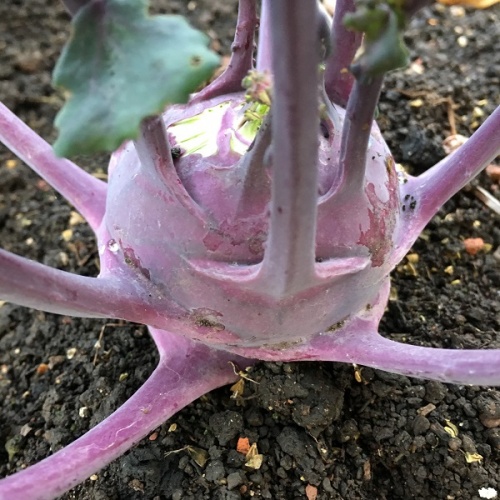
Delicacy Purple is an early maturing purple variety with round shaped stems and.....
Average Contents : 250 seeds
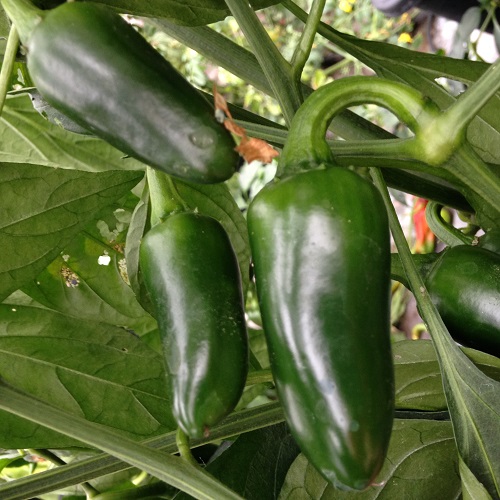
Chilli Jalapeno is the chilli most often used for nachos.....
Average Contents : 20 Seeds
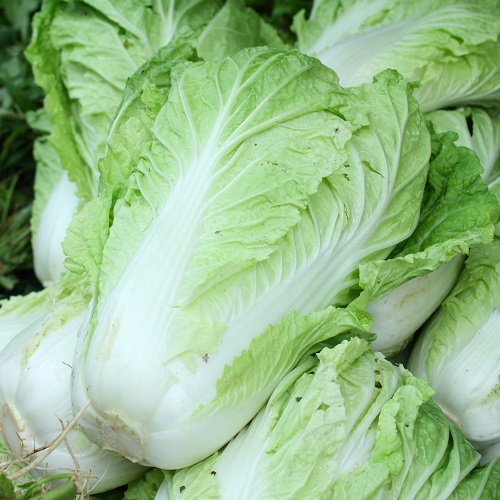
Produces large, barrel shaped heads, with crisp light green.....
Av. Packet Contents : 400 seeds
Type: Chinese Cabbage, Summer
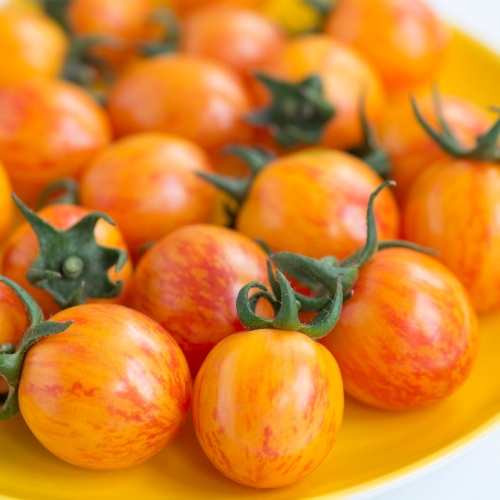
Produces striking Golden yellow fruits with.....
Growth Habit - Cordon.
Average Packet Contents : 10 seeds