

26 July 2024
Pak Choi is grown for its tasty leaves which are superb when added to stir fries and salads.
The taste is similar to that of mild cabbage and spinach and is a popular addition to many oriental dishes.
Posted in Blog Home

Purple sprouting broccoli is well-suited to growing in the UK for several reasons. First, its ability to withstand cooler temperatures makes it ideal for the UK's climate, especially during the colder months when traditional broccoli might struggle to thrive.
Additionally, purple sprouting broccoli has a long growing season, typically planted in spring and harvested in late winter or early spring of the following year. This aligns well with the UK's climate and allows for a staggered harvest, providing fresh produce during a time when there might be fewer locally grown vegetables available.
Moreover, purple sprouting broccoli is not just hardy but also nutritious and flavorful, making it a popular choice for home gardeners and commercial growers alike. Its vibrant color and distinct taste add variety to meals, encouraging its cultivation in the UK where there's a growing interest in diverse and locally sourced produce.
Purple Sprouting Broccoli Seeds can be sown between March and July but if sowing outdoors, it’s advisable not to sow until April. Purple sprouting broccoli is a winter cropping vegetable, which can be started early in a greenhouse during March or sown directly into seed beds during favourable weather conditions.
Seeds can be sown in small pots or modular trays during March. Place 2 seeds into a pot or module of seed compost at 1.5cm deep and lightly cover with sifted compost. Firm the surface and water lightly using a watering can with a rose attachment. After germination, reduce to one seed per unit. Keep the seedlings watered. After 2-3 weeks move the plants to a cold frame to harden off then plant out into prepared beds 7-10 days later.
If sowing directly into seed beds outdoors, use the edge of a hoe to create a shallow furrow about 2cm deep. Sow 2-3 seeds every 60cm and lightly cover with soil. Gently firm down the surface, using the back of a rake then water with a watering can with a rose attachment. When seedlings appear, reduce to one plant per 60cm. If growing several plants in rows then allow 60cm between rows.
All brassicas appreciate a sunny position and well-drained soil. Prepare the soil in late autumn or early winter by incorporating plenty of organic matter. Heavy clay type soils would benefit from the addition of lime and sharp sand to aid drainage. Before sowing seeds, rake the surface soil to a fine, level tilth and then firm with the back of a rake. Sprinkle a granular fertiliser at the rate of 150gm per square metre over the surface and then lightly rake in.
Plants that have been started off under glass and then hardened off can be planted out into their final beds or plots during April. Water the pots or trays about an hour before planting out. Plant out into their permanent positions, 60cm apart and 60cm between rows, using a hand trowel. Ensure the soil is firmed, especially around the base of the plants and then water in.
Water young plants regularly to ensure they do not dry out. Plants that dry out are likely to bolt (run to seed). Remove any weeds, which grow between the plants and rows to discourage pests and diseases, and to maintain soil moisture. A mulch of compost, bark or straw would be beneficial in maintaining moisture and could help to discourage cabbage root fly. As plants become established a light sprinkling of general fertiliser every 2-3 weeks will help them develop healthy leaves and florets. Avoid fertilisers that contain high percentages of nitrogen as this will encourage excessive leaf growth at the expense of sprouting heads. A liquid vegetable fertiliser applied at every other watering is an alternative.
To prevent birds from pecking the young florets, spread fine plastic netting over the developing plants.
The brassica family can be subject to attack by several pests and diseases including the Cabbage White Butterfly, which lays its eggs on the underside of leaves. The young caterpillars can literally strip a plant bare within just a few days. Check the underside of leaves regularly and remove any eggs before they hatch. Cabbage White Fly is another troublesome pest and again eggs are laid on the underside of leaves and should be removed before adult flies emerge.
Cabbage Root Fly is a more serious pest. The adults lay eggs at the base of seedlings and the emerging grubs burrow down to feast on the roots. The use of nematodes, which hunt down and attack the larvae are a good natural control method. The most common disease is the Club Root fungus, which can affect all members of the cabbage family. Affected plants become stunted and show signs of purple discolouration on their leaves. There is no remedy for this problem except to rotate crops every year.
Cut the purple ‘spears’ from the centre first, when they become well-formed and before the small florets open. Cut the shoots off at an angle, which will allow water to run off. Side shoots will then appear within a few weeks with more sprouting spears, ready for harvesting over the coming 4-6 weeks.
Have you had success growing Purple Sprouting Broccoli? Leave a comment below and let everyone know....
All blog content on this page is copyright of SimplySeed and is not to be reproduced without prior written permission. ©
Pak Choi is grown for its tasty leaves which are superb when added to stir fries and salads.
The taste is similar to that of mild cabbage and spinach and is a popular addition to many oriental dishes.

Feeding cucumber plants is crucial for healthy growth and plenty of fruit. Knowing when to start feeding and what fertilisers to use can make all the difference in your harvest.
Here’s our top tips and best practices

As July’s warm sunshine brings growth to UK gardens they also bring several common garden diseases.
Our Blog post looks at 5 garden diseases to watch out for this July and how to prevent and treat them.

Planting in autumn is usually better as it allows the cloves to get established before winter and then produce better clove formation in spring.
If you miss the autumn window don’t worry – you can still plant....

Oregano and marjoram are related but have different flavours; oregano is bold and pungent, whilst marjoram is sweet and floral....

When and how to cut back lavender in the UK? Find out the method and best time to cut back your lavender for a profusion of flowers....
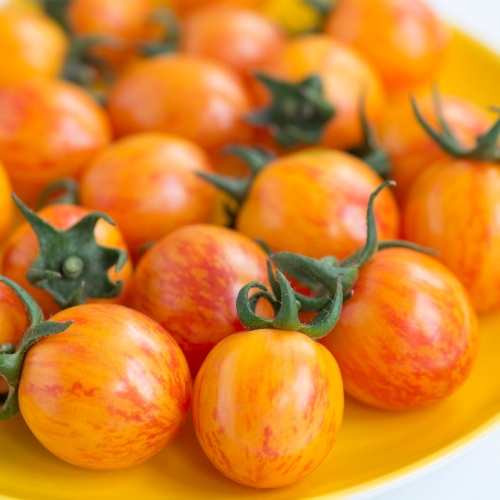
Produces striking Golden yellow fruits with.....
Growth Habit - Cordon.
Average Packet Contents : 10 seeds
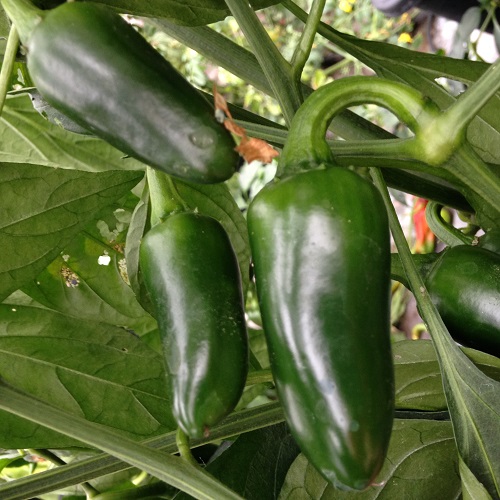
Chilli Jalapeno is the chilli most often used for nachos.....
Average Contents : 20 Seeds
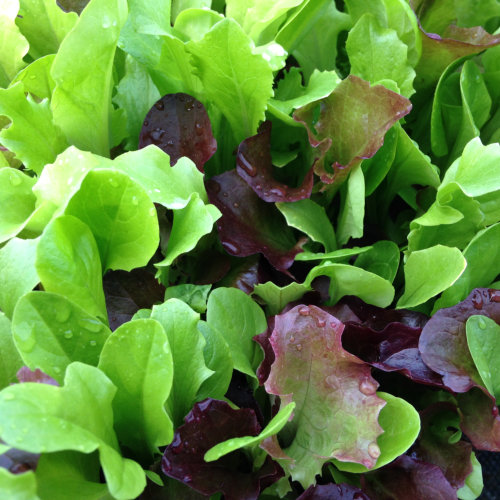
Mix of Lettuce varieties suitable for use as a cut and come.....
Average Contents : 1.5g, approx 1000 seeds
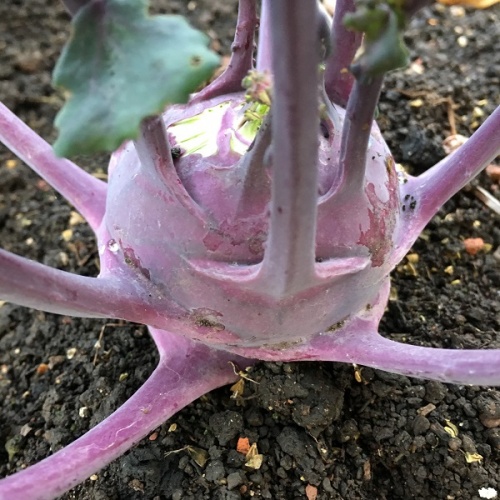
Delicacy Purple is an early maturing purple variety with round shaped stems and.....
Average Contents : 250 seeds
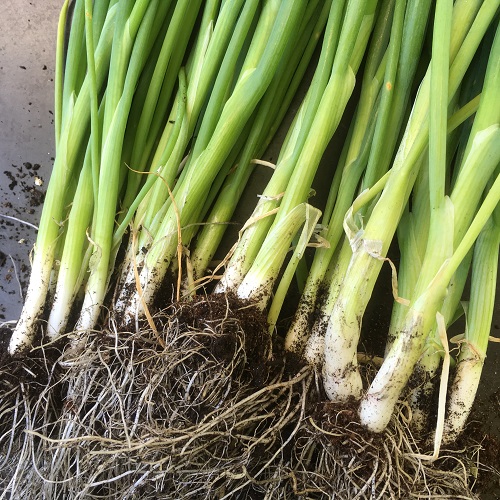
White Lisbon is the standard variety for bulbing salad.....
Average Contents : 500 seeds
Produces large, barrel shaped heads, with crisp light green.....
Av. Packet Contents : 400 seeds
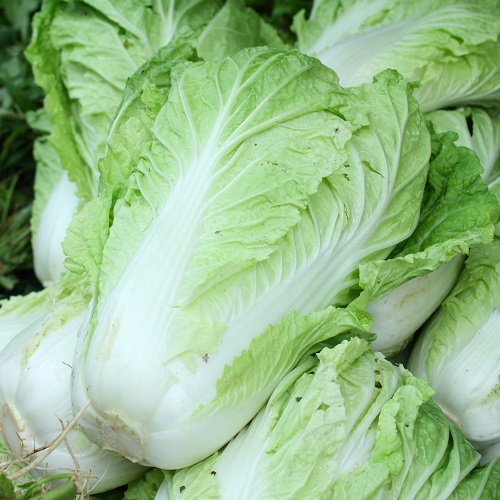
Type: Chinese Cabbage, Summer