I use herbs a lot, both for cooking and for medicinal purposes. I even use them as part of the vegetable growing process.
I make large quantities of comfrey “tea”, not to drink (most definitely not for human consumption as it’s toxic, but as a liquid feed for my vegetable plants.
Comfrey tea contains lots of nitrogen and potassium. I make it by picking comfrey leaves, stuffing them into an old onion nylon net bag and suspending it from a piece of string inside a rain-water butt. Within a short time, the comfrey tea will have brewed into an evil smelling liquid. As soon as it smells truly awful, you know it's ready to use as an organic liquid feed.
I dilute it about one part water to three parts comfrey liquid. Comfrey has the added bonus of being very pretty ground cover and the bees really appreciate the early flowers. It also helps me a little in my constant battle with the ground elder in the garden by smothering it.
 We have several old butler sinks that we use as herb planters near the kitchen door, very handy for popping out mid-recipe for a few leaves of this or that. I've never had much sustained success growing thyme in containers it much prefers the free draining chalky soil at my allotment, so I have a large section devoted just to thyme. We use an awful lot of it, as our favourite Sunday lunch is roasted chicken and we always stuff the cavity with lots of thyme and gloves of garlic. If I suggest we have something different for Sunday lunch there are always disappointed faces, so a large thyme section is definitely needed at the allotment.
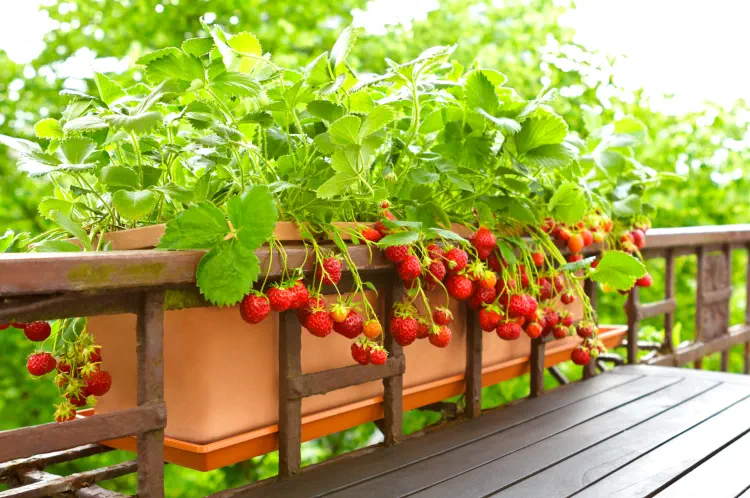
 We also use a lot of flat leaf parsley which also seems to feel at home anywhere in the vegetable plot. It likes to seed itself if I let it flower, so there are usually surprise parsley plants popping up among the strawberries.
We're currently planting up another herb sink. Here’s the essential layer of broken crocks and stones for drainage. The sinks obviously have a plug hole, but it's important not to allow that to get blocked so a layer of stones and crocks does that.
Of course you don't need an old sink, any container or pot can be used for your herbs. They look very attractive by the back door step, on the patio, or wherever you have a spare few inches. Sinks, pots and other containers are also useful for keeping invasive herbs like mint and lemon balm in check. Our sinks usually have mint, chives, oregano, lemon balm, and sage. We put the thyme, parsley, more chives, tarragon, dill and comfrey straight out into the garden and allotment.
Chives are fabulous at this time of year, so pick some and make these delicious and easy cheese and chive scones.

Cheese and Chive Scones Recipe
Makes 6 scones
For the scones:
75g grated cheese. You can use any kind, cheddar, Cheshire, whatever you’ve got a bit of to use up. I used Double Gloucester for these ones
1 heaped tablespoon for chopped chives
175g self-raising flour
½ level teaspoon of mustard powder
½ level teaspoon salt
A pinch of cayenne pepper
25g unsalted butter
1 large egg2 to 3 tablespoons of buttermilk
For the topping
15g grated cheese
Milk for brushing the tops
- Preheat your oven to Gas mark 7, or 425°F /220°C, find a 6cm fluted cutter and grease 25 x 30cm baking sheet.
- Sift the flour into a bowl to give it some air, then add the mustard, salt and pinch of cayenne. Mix to combine and then either rub the butter in using your fingertips, or use a food processor.
- Add the first lot of grated cheese and the chives.
- Beat the egg with two tablespoons of the buttermilk and then gradually add the egg mixture to the dry ingredients. Add a little more buttermilk if it’s really dry.
- You’re aiming for smooth dough without any dry ingredients left in the bowl, but without the dough being sticky. Don’t over work the dough of your scones will be better used as doorstops!
- Carefully roll it out onto a floured surface so that it’s about an inch thick. No thinner or they won’t rise nicely.
- Cut out the rounds, re-rolling the scraps of dough if needed to make 6. Put them on the greased baking sheet, brush the tops with milk and sprinkle with the second lot of cheese.
- Bake for 15-20 minutes, then leave to cool on a rack (if you can, I only ever seem to have 3 left by the time they’re cool!)
For a selection of herb varieties see: Herb Seeds
All blog content on this page is copyright of Simplyseed and is not to be reproduced without prior written permission. ©